I decided I just couldn’t move on to Step 5 with a little bit more of Step 4. I felt a little like I left you hanging. I came to you with a design dilemma, and I didn’t really finish out my process, how I put the design together, and what a refined, client presentable product looks like. If I left feeling unfulfilled, then I am sure you did too. Plus, I had already made a video so, hey, why not share my efforts with the world! #ihaveloftygoals
On a more serious note, this is a great demonstration of why this part of the process takes so long and is so involved. This is where the bulk of our time as designers is spent. This is, quite frankly, where the value of a designer comes in. This is where the bulk of your time as a DIY-er should be spent as well. Spending time sitting in this process is what makes our (and your) design unique, personalized, detailed, and timeless. It just simply cannot be done on a HomeGoods and Target run. Your home will not be personal. It will look like everyone else’s who did the same run four Sundays in a row when the Target ad came out. It will have the same pillow, artwork, and candleholders that you spy in the back of your neighbor’s Facebook photo. (Don’t think that because you go to the “good” HomeGoods that your neighbor isn’t too!) Your space will not have a gasp factor, and you will need to change it as soon as the new collab lands at Target.
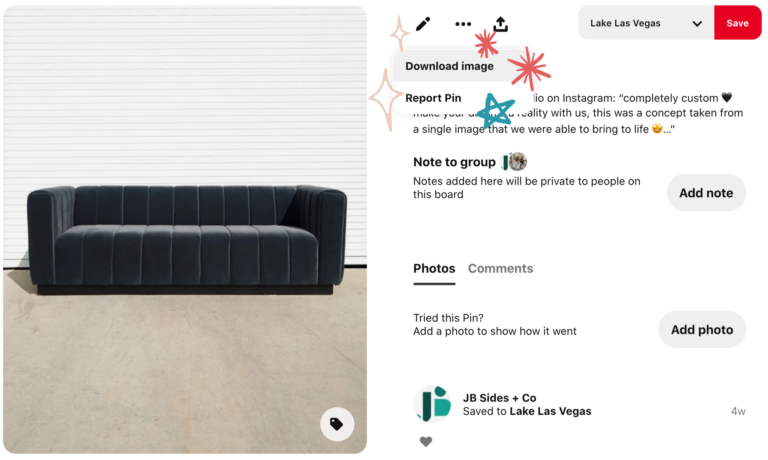
Back to the process. Once I have some good options for each element of the room, I start narrowing down by creating a Design Board. Remember how much I love Pinterest?! Well, this is where we start to part ways. I told you in Step 2 how early on I discovered the miracle of Pinterest images. Now, instead of right-click save, they let you Straight. Up. Download. Raising Hands Emoji! (You know which one.) The rest is fairly mundane…I download, organize in folders (organization is KEY. I may need to refer to these images regularly. They are now part of the design Bible for your project.) Then I drag them all into Photoshop and get to work. Thinking about going the distance with your DIY project? Have at it! You don’t need to pay for Photoshop or attempt to figure it out. PowerPoint and Keynote work great, as well as many online options, like Canva that can do the trick.
Now, what does getting to work look like? Well, it’s actually a lot of moving parts. At this point, you might be asking, “but wait, how do you know what is going where and what sizes and how many and…and…?” Well, there are a few more moving parts here. And it depends on the job. Is it a full renovation? Is it just furnishings? Is it both? I told you, this Step is the longest and most robust. I’ve shown you the fun parts, but there are details that may or may not be required at different points in this process.
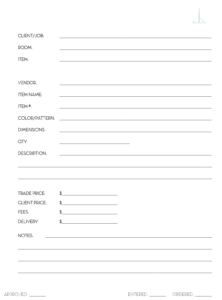
For starters, I have already created a list of everything I need for the space. This technically is part of project set-up. Every single item needed goes into a fancy spreadsheet. At one point in time I printed a sh**load of paper and hand wrote each item, filling in the details as I made selections, and attached an image, or what we call a tear sheet, to the item description. In my commitments to being a more sustainable business, I had to nix the paper and focus on designing and project managing as digitally as possible. Trust me, it is a difficult feat, but it can be done.
I have also taken measurements of the space already and have determined what size a sofa, coffee table, dining table, so on, and so on, need to be in order to fit. I may or may not have done a space plan at this point as well, but it inevitably gets done. This is an important part of the process to ensure everything fits in the space and is scaled properly, as well as leaving proper walkways and sitting room. More on this later.
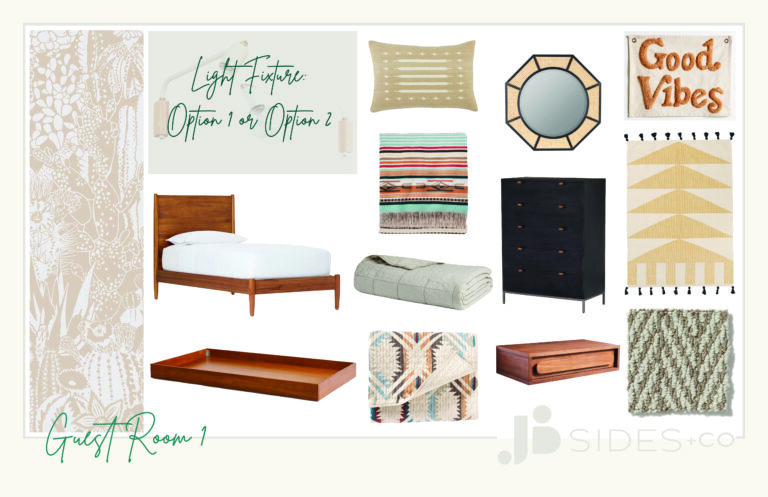
In Step 4-Part 1 I let you into my design pickle and you could see how I maneuvered my sourced items around to make my selections. Yes, you read right, selections. This is where I finally make my selections for the space. My final selections are what get presented to the client. As you saw, I had other good options, so those become my back-ups, or options two and three (option four tows the line of too many and can overwhelm a client). Back-ups are in case the client doesn’t care for my first selections, back-ups in case and item goes out of stock, or worse, discontinued. (It all happens. You just cross your fingers it doesn’t result in a whole reselect of the space.) I use the design board to see how a mirror looks over a vanity and a light fixture to top it off. How a wallcovering looks with an area rug and bedding. How the shapes and textures play together as a whole, supplemented with real, live samples. As a designer, I can visualize how the space is going to come together, if it looks cohesive or not, and if I need to add or edit the details. At times it is difficult for a client to visualize the space with just a design board. If you hang with me, I’ll share the good stuff. When the space comes to fruition, but before you see it in real life.
Check out download to output in the video below and keep following to see [Inside] The Design Process and how the Lake Las Vegas project comes to life.